

Mein Zmittag im Migrosrestaurant: Glarnerhörnli mit Schabziger. Gruss an Thisss
im velodrom in aigle
so ein bisschen zum geburtstag habe ich mir einen abend mit freunden im velodrome in aigle geschenkt. das heisst, ich habe dort eine sogenannte “iniation a la piste” organisiert, und wir wurden in das bahnfahren eingeführt.
nicht bahnfahren mit dem zug und schienen untendran, sondern bahnfahren mit einem richtigen bahnrennvelo und einer 200m langen holzbahn untendran, also fast wie am sechstagerennen, einfach nur 2 stunden statt 6 tage…
das ganze war – mann kann es fast nicht ander sagen – ziemlich geil. die fotos, die ich gemacht habe, sind unten zu sehen. der ige wirth hat noch ein-zwei coole videos gemacht, falls die online verfügbar werden, gibt’s dann auch noch ein link:

die fotos (und die rangliste des 200m-sprint) sind in meinem velodrome-set auf flickr zu finden.
timelapse: sunrise @ mount bromo
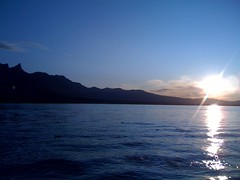
Ich bin wieder da, schön wars, mindestens so schön wie dieser sonnenaufgang auf dem aussichtspunkt zum bromo, den ich aufgenommen habe.
25 minuten sonnenaufgang komprimiert in 30 Sekunden. da ich mit der grossen kamera am fotografieren war, habe ich einfach ein film aufgenommen und jedes 50. bild daraus für dieses timelapse verwendet. wenn nicht irgend so ein dahergelaufener japaner meine sauber positionierte kamera hätte klauen wollen, wäre auch der sonnenaufgang drauf, so sieht man halt nur, wie es hell wird.
der rest der heimgenommenen videos und fotos wird nach und nach an den altbekannten stellen erscheinen.
tschou zäme!
wenn alles klappt, fliege ich genau jetzt von zürich in die ferien. normal operation will resume after my return.
wen’s interessiert, wo ich (mit begleitung) die nächsten drei wochen verbringe: wir nehmen flug nummer EK088 und EK356.
zugriffszahlen
kleines update zu der geschichte mit dem nicht korrekt referenzierten bild, das 78s von mir verwendet und den lapsus mittlerweile korrigiert hat: an diesem tag gab’s grad mehr als 4mal die normalen zugriffe auf meine seite. der peak sieht in meinem admin-interface so aus:

da kann die bz mit ihren 50 zusätzlichen hits grad einpacken…
Bilderklau bei www.78s.ch [update]
eine etwas längere geschichte, aber heute bin ich bei 78s auf einen beitrag gestossen, bei dem mir das foto extrem bekannt vorkam. es ist mein panorama vom joss stone konzert am gurtenfestival 2007, zugegebenermassen kein extrem gutes bild, aber immerhin.
david bauer (ja, ich glaub der sonntagszeitungs-schreiber, der letzthin über blabla-blogs geschrieben hat) verwendet in seinem beitrag über den festivalsommer ein foto von mir. das ehrt mich zwar, dass er dies aber ohne die obligatorische erwähnung meines namens macht und dazu noch das foto nicht mit dem original verlinkt, ist extrem doof, nämlich einfach geklaut. ich habe meinem vornamensvetter soeben ein mail geschrieben, mal schauen, wie sich das ganze entwickelt…
update – 12. August 2009 19:46:
herr bauer hat auf dieses mail von mir:
hallo david.
ich bin soeben bei chm’s shared items im google reader [1] auf deinen beitrag über den festivalsommer 2009 [2] gestossen. ich weiss, ich bin extrem spät, denn der beitrag ist schon einige monate online, aber trotzdem muss ich mich melden. es freut mich zwar, dass du ein foto von mir [3] zur illustration deines blog-beitrags brauchst, aber extrem doof finde ich, dass du das foto einfach geklaut hast. laut den lizenzbestimmungen auf der flickr-seite [4] müsstest du wenigstens meinen namen erwähnen.
gerade von dir als jouralist würde ich erwarten, dass dir solche sachen nicht passieren. darf ich dich bitten, die nötige erwähnung meines namen unter dem foto noch einzufügen? im extremfall würdest du mir evtl. sogar noch lizenzgebühren schulden, da das foto auch nicht mit dem original verlinkt ist, aber davon lassen wir jetzt mal ab…gruss habi
[1]: https://www.google.com/reader/view/user/10623017948859471534/state/com.google/broadcast
[2]: http://www.78s.ch/2009/02/21/so-wird-der-festivalsommer-2009/
[3]: http://www.flickr.com/photos/habi/888370993/
[4]: http://creativecommons.org/licenses/by/2.0/deed.en_GB
folgendermassen reagiert: Er hat sich entschuldigt, und gemeint, dass er jeweils die lizenzbedingungen respektiert, in diesem fall dies aber vergessen hat. er will dies am wochenende in ordnung bringen und entschuldigt sich.Was meint ihr? Trotzdem Rechnung stellen? Ich glaub’ ich mach’s, werde aber den betrag dann bei kiva.org weiterspenden.
update – 13. August 2009 15:24:
david hat nach meinem folgemail
Guten Abend David.
Speziell als Journalist solltest du wissen, dass Unabsichtlichkeit nicht davor schützt, einen Fehler zu machen.Wenn ich mir eure Seite so anschaue, fehlt allenorten der Hinweis auf den Urheber der Bilder, auch wenn viele der Fotos wohl aus den Presse-Mappen der Bands stammen. Von mir aus gesehen reicht ein “cc by …” im alt-Text aber sowieso nicht, um der geforderten Attribution bei creative commons-Bildern genug zu tun.Ein bisschen erstaunlich finde ich, dass es bis zum Wochenende dauern wird, bis der Lapsus korrigiert ist, sind alle 78s Teammitglieder in den Ferien?
Schön fände ich es, wenn du mir im Nachhinein ein Honorar überweisen könntest. Je nachdem wie mann die Honorarliste der SAB auslegt, schuldest du mir von 100 bis 750.- Ein solches Honorar werde ich nicht für mich selbst verwenden, sondern als Spende auf kiva.org weiterverwerten.
Gruss
Habi[1]: http://www.sab-photo.ch/index.cfm?id=30
freundlich geantwortet, dass er den fehler einsieht, dass 78s praktisch ausschliesslich pressebilder verwendet und ansonsten die rechte der bild-urheber berücksichtigt. er werde den fehler baldmöglichst korrigieren, ist aber überhaupt nicht auf meine spendeaufforderung eingegangen. henu, dann schauen wir mal, wie’s ab dem wochenende aussieht. mir geht’s ja nicht ums geld, also werde ich auch keine rechnung stellen. aber auch keine extrem gute meinung von 78s aus dieser affäre heraus weitertragen…
update – 15. August 2009 10:34:
mittlerweilen hat david seinen lapsus korrigiert, und dies in einem kommentar festgehalten. zusätzlich hat er mich gebeten, seine email nicht im wortlaut zu veröffentlichen und den haltlosen vorwurf im zusammenhang mit tagi/newsnetz zu entfernen. die angebotene flasche wein lehne ich ab, wer mich kennt weiss warum. damit erachte ich die angelegenheit als erledigt.
habi fährt ans buskers – timelapse
nachdem mark gezeigt hat, dass mann sogar im tram timelapse-filme machen kann, habe ich heute abend beim velofahren den auslöser meiner kamera gedrückt gehalten, während ich in die stadt gefahren bin. das endresultat ist ein wackeliges timelapse-filmli von mir zuhause bis knapp vors buskers.
https://vimeo.com/6001222
den rest der fotos, die ich heute abend gemacht habe, sind in meinem buskers 2009-set zu finden.
ps: wieviele verkehrsregeln habe ich gebrochen?
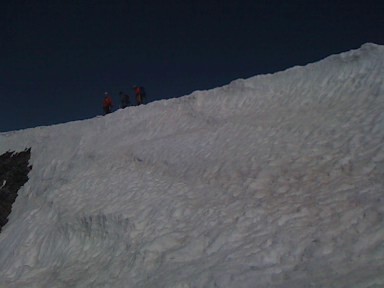
allalinhorn
schon seit einiger zeit hat mir dan, mein ehemaliger mitbewohner, den floh ins ohr gesetzt, dass wir mal auf’s allalinhorn wandern könnten. das allalinhorn ist einer der schweizer 4000er, der als einfach zu ersteigen gilt. dank öV kann mensch bis ca. 600m unter den gipfel des allalinhorns anreisen und dann in ca. 2.5h hoch und in gut 1.5h wieder runterwandern. auch wenn das allalinhorn als einfach zu ersteigender 4000er gilt, waren trotzdem seil, gschtältli, steigeisen und pickel notwendig. dank bekannten war dies aber einfach zu organisieren und so machten wir uns am samstag morgen um 06.07 auf den weg ins wallis um die hochtour zu starten.
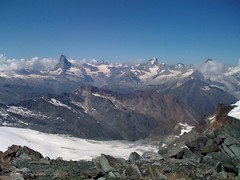
knapp 3h später waren wir in mittelallalin angekommen, wunderbares wetter erwartete uns, und so machten wir uns auf, den gipfel in angriff zu nehmen. nachdem wir einige gletscherspalten überwunden hatten, belohnte uns erstmals die aussicht vom feejoch für den steilen aufstieg. eine knappe dreiviertelstunde später waren wir dann auf dem gipfel und konnten die aussicht vom allalinhorn geniessen. weil wir’s im aufstieg gemütlich genommen hatten, waren wider erwarten nicht mehr so viele bergsteiger auf dem horn, so dass wir auch eine ausgiebige mittagspause machen konnten. der abstieg war dann weit weniger anstrengend, als der aufstieg, so dass wir bald noch die sonne auf der terrasse des mittelallalin-restaurants geniessen konnten.
ein wunderbarer tag (auch wenn ich mir im abstieg mit dem steigeisen ein loch in die wade gepierct habe), für etwas bergfeste wanderer also uneingeschränkt zu empfehlen.
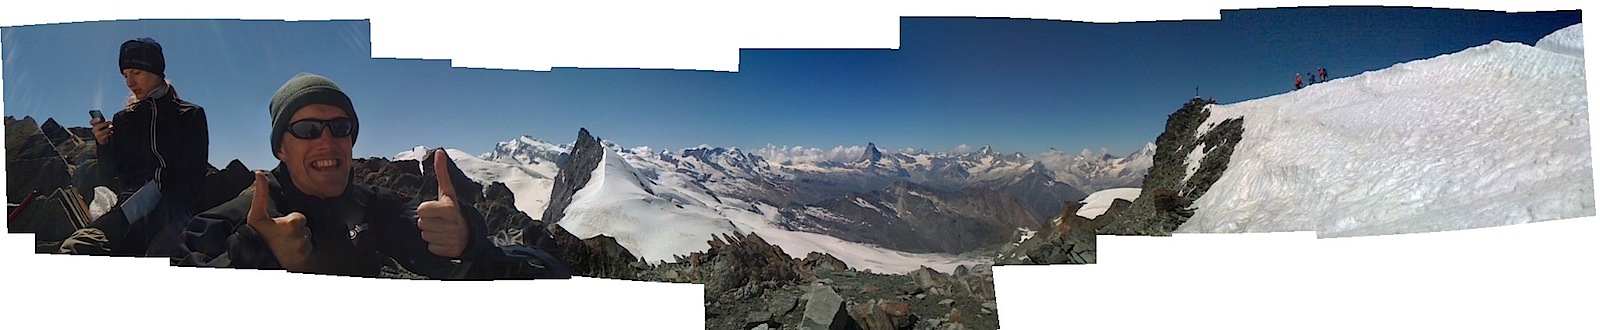
alle fotos zur wanderung sind im set allalinhorn in meinem flickr-stream zu finden. und damit ich auch frau chnüblers wunsch erfülle, hier noch ein foto vom peak (oder war das anders gemeint?)

wer sich für die genauen details der wanderung interessiert, findet das tracklog auf gpsies.com. speziell hinweisen möcht’ ich noch auf die drei panoramen, die ich gemacht habe. wie schon mal gezeigt, habe ich aus drei filmen (1, 2, 3) die bilder extrahiert und daraus panoramas erstellt. die beiden oben verlinkten 360°-panoramas sind gut gelungen, ganz speziell gefällt mir aber das untenstehende filmli, weil’s die stimmung unserer wandertruppe perfekt wiedergibt:
Liveblogging from 4027m
Wer findet raus, auf welchen Berg wir hochgelaufen sind?
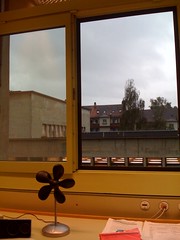
Pimped Home-Office

Dank dem Plotter der Informatikdienste der Uni Bern habe ich jetzt vom
Schreibtisch aus Tag- und Nacht-Aussicht auf den BahnhofsPlatz. Subi!
Klettersteig Gantrisch
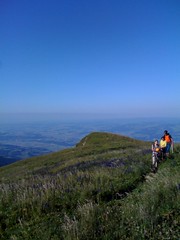
Für diese Aussicht lohnt es sich unbedingt, früher Feierabend zu
machen!
sent from my iPhone, please excuse my brevity and the potential typos.
aaaaah! ohrenkrebs!
[via leumund] (und facebook, das für seine einträge leider keine permalinks macht)
Gute Sicht
Jedenfalls ober Wasser, unter Wasser so schlecht wie schon lange nicht mehr. Deshalb geniessen wir jetzt noch den Sonnenuntergang.
Balkon-Timelapse
ich hab ja herr timelapse leu versprochen, dass ich mit bastians fisheye-objektiv noch ein timelapse-film machen werde. heute nachmittag (nein, ich bin nicht auf dem gurten) hab’ ich dann sofortbild.app gestartet und in gut 2 stunden und 45 minuten genau 990 bilder (bis die batterie der kamera leer war) aufgenommen.
dank dem unsteten wetter entstehen daraus dramatische 40 sekunden (die auch direkt auf vimeo in HD angeschaut werden können):
Gurtenfestival
Ich glaub’ ich bleib noch ein bisschen im Büro bei dem Regen, Peter Fox spielt ja erst später am Abend…
sent from my iPhone, please excuse my brevity and the potential typos.
fun with a fisheye-lens
bastian hat mir sein Nikon 10.5mm f/2.8 DX Fisheye-objektiv ausgeliehen, damit ich mal ein fisheye ausprobieren kann, dass ich nicht komplett manuell einstellen muss. mit meinem zenitar bin ich zwar sehr zufrieden, es macht auch gelungene fotos, verlangt aber nach einer vollständig manuellen einstellung und das ist zuweilen schon ein bisschen mühsam.
am donnerstag abend bin ich also mit bastians objektiv auf eine ganz kleine foto-safari, welche mich angeregt hat, zu sparen, denn so ein objektiv hat schon noch ‘was. mit minimalem aufwand (9 fotos auf dem stativ) gelingen aufnahmen wie diese vom uni hauptgebäude, eine komplette rundumsicht auf der uniterrasse:
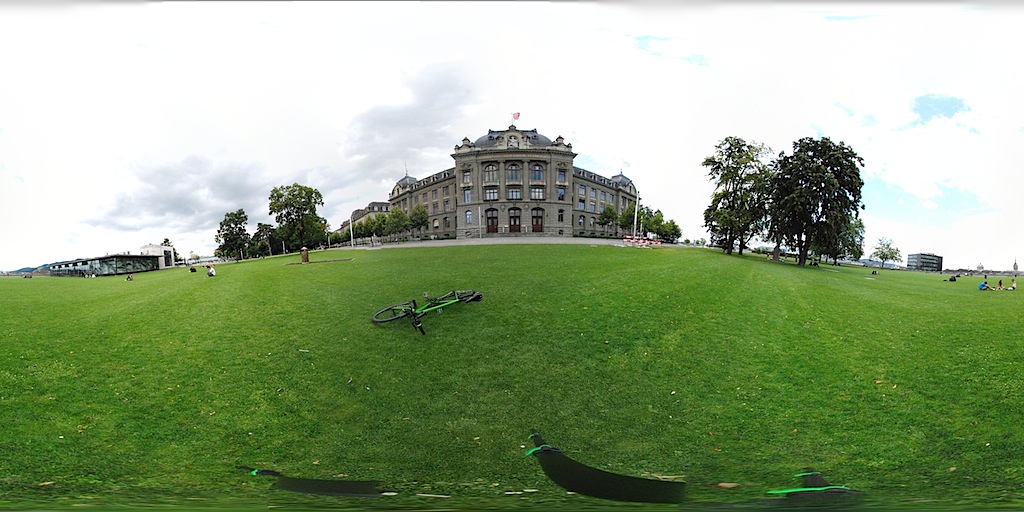
richtig spannend wird’s erst, wenn man bilder wie dieses weiterverarbeitet: erstens kann mann mit spincontrol:vr immersive panoramas machen, was dann aussieht wie hier zu sehen. noch lustiger wird’s, wenn mann das 360°x180°-panorama-bild zu einem sogenannten kleinen planeten umrechnet, dann sieht das uni-hauptgebäude aus, als wäre es einem comic-strip entsprungen:
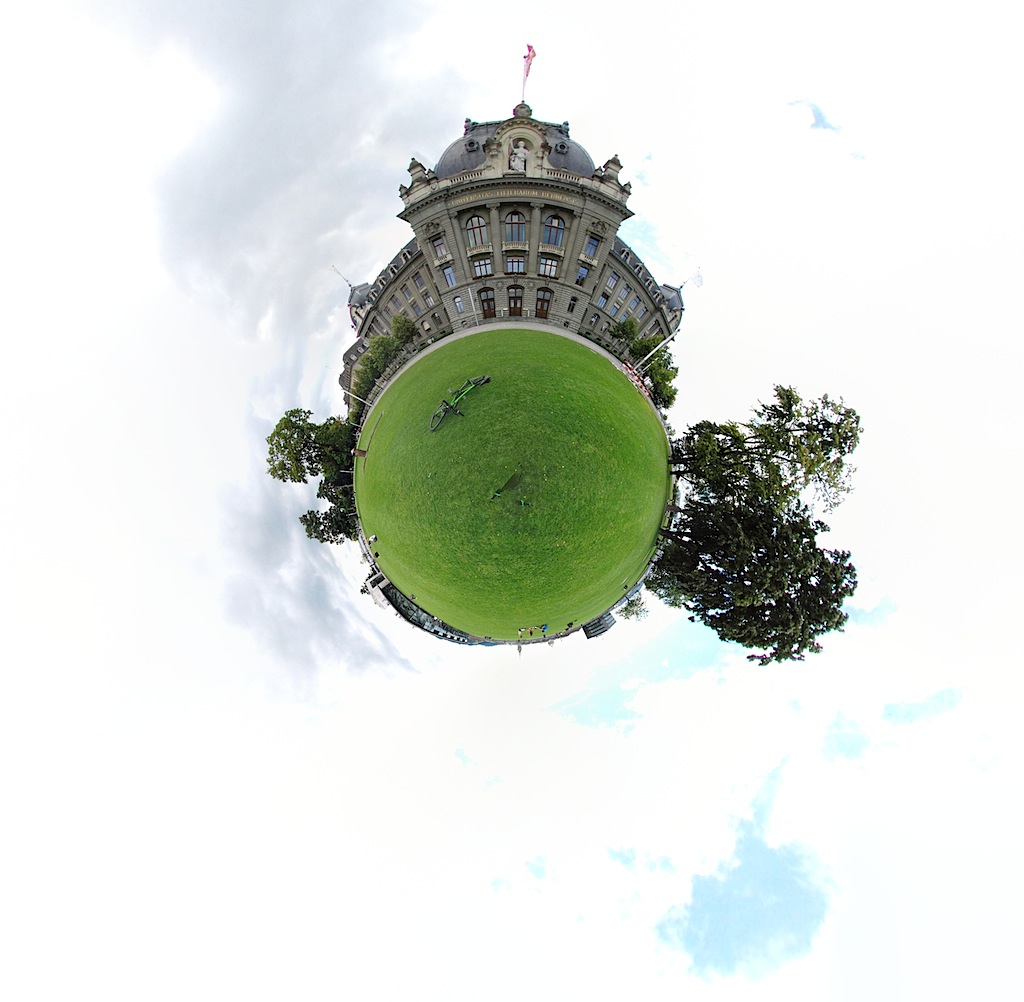
bastian hat die vorabversion dieses panoramas schon gesehen und meinte der himmel wäre noch besser zur geltung gekommen, wenn ich die blende etwas zurückgenommen hätte. beim zweiten panorama habe ich gerade vorgesorgt und ein etwas komplexeres setup gemacht.

auf dem bundesplatz habe ich für jedes der neun fotos drei belichtungen gemacht, einmal normal und je einmal über- und unterbelichtet. diese panoramas wurden dann zusammengerechnet, so dass der dramatische himmel ein bisschen besser zur geltung kommt als auf der uniterrasse. das panorama des bundesplatzes gibts auch noch in einer immersiven version sowie als little planet. bei diesem kleinen planeten habe ich mit der von mir gewählten ausrichtung der kamera ein bisschen gekämpft, also musste ich beim nadir-punkt (ganz unten bzw. ganz in der mitte beim kleinen planeten) ein bisschen tricksen. dafür hat’s jetzt noch die credits drin :)

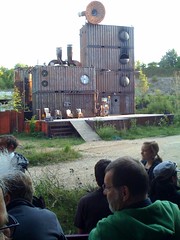
Silo8
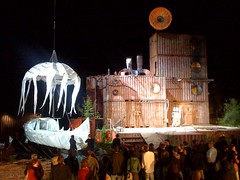
Silo8
Zugriffszahlen nach dem Artikel in der BZ
mich als zahlen-nerd hat’s interessiert, ob und wie sich die zugriffs-zahlen auf mein bescheidenes blog verändern, wenn meine URL in der BZ auftaucht.
wie mensch die zugriffszahlen anschaut, die das offizielle wordpress stats-plugin liefert (bild 1), dann ist zu sehen, dass
- ich vergessen habe, nach dem update auf WP 2.8 den code-schnipsel für die statistik in mein theme einzufügen (13.6-22.6)
- durch den artikel ca. 50-60 zusätzliche zugriffe geschahen
- diese zugriffe aber meist direkt und nicht von der BZ-seite her selbst geschahen, denn google analytics meldet nur 3 referrers vom artikel direkt (bild 2)
- ich im normalfall 50-70 besucher und besucherinnen pro tag auf der seite habe


wie sieht’s bei den drei christians aus? erkennt ihr einen peak in euren besuchern, oder gehen die paar zugriffe bei euren immensen zugriffszahlen im rauschen unter?
evernote auf dem iphone [update]
heute morgen ist mal wieder ein kleines textli von mir in der berner zeitung erschienen, diesmal nicht im rahmen eines tastentests, sonders als untermalung des artikels über das neue iphone.
herr this hat einige berner iphonebesitzer und blogger gefragt, ob sie über ihre lieblings-applikation schreiben würden. da herr studer schon über air-sharing schrieb, habe ich eine andere meiner vielbenutzten anwendungen geschrieben, über evernote, dass nicht nur auf dem iPhone, sondern auch auf dem kompi zuhause und im büro eine grosse hilfe ist (und mir mal von herrn skooba empfohlen wurde). meine ungefähr 900 zeichen dazu sind heute in der berner zeitung erschienen, scheinen aber momentan nicht auf den seiten der bz zu erscheinen. wer den artikel (so wie ich ihn bei herrn this eingereicht habe) lesen will, kann dies in meinen öffentlichen notizen bei evernote tun. die anderen applikationen, die vorgestellt wurden sind wie gesagt, air sharing von herrn studer, die navigon-navigation von herrn leu und das auch unglaublich praktische shazam von herrn michel.
update: der haupt-artikel ist hier, christians air sharing-text hier, christians mobile navigator-text ist hier, christians shazam-text ist hier, mein evernote-text ist hier